DIY tile installation seems like easy money savings – until it becomes a nightmare that costs double what professional installation would have. We've seen countless Sacramento homeowners learn this lesson the hard way.
The brutal truth? That "simple" tile job you saw on YouTube involves complex decisions about adhesives, waterproofing, layout planning, and precise execution. One wrong move can destroy your entire renovation budget.
In our 20+ years serving Sacramento, we've rescued homeowners from every possible tile disaster – from minor aesthetic issues to catastrophic failures requiring complete gut-and-redo jobs costing $15,000-$30,000+.
Here's what we'll cover:
- The 7 most expensive DIY tile mistakes we see weekly
- Real cost breakdowns of fixing these disasters
- Why professional installation actually saves money
- How to protect your renovation investment
Bottom line: These mistakes don't just look bad – they can cause water damage, structural problems, and health hazards that devastate your home and budget.
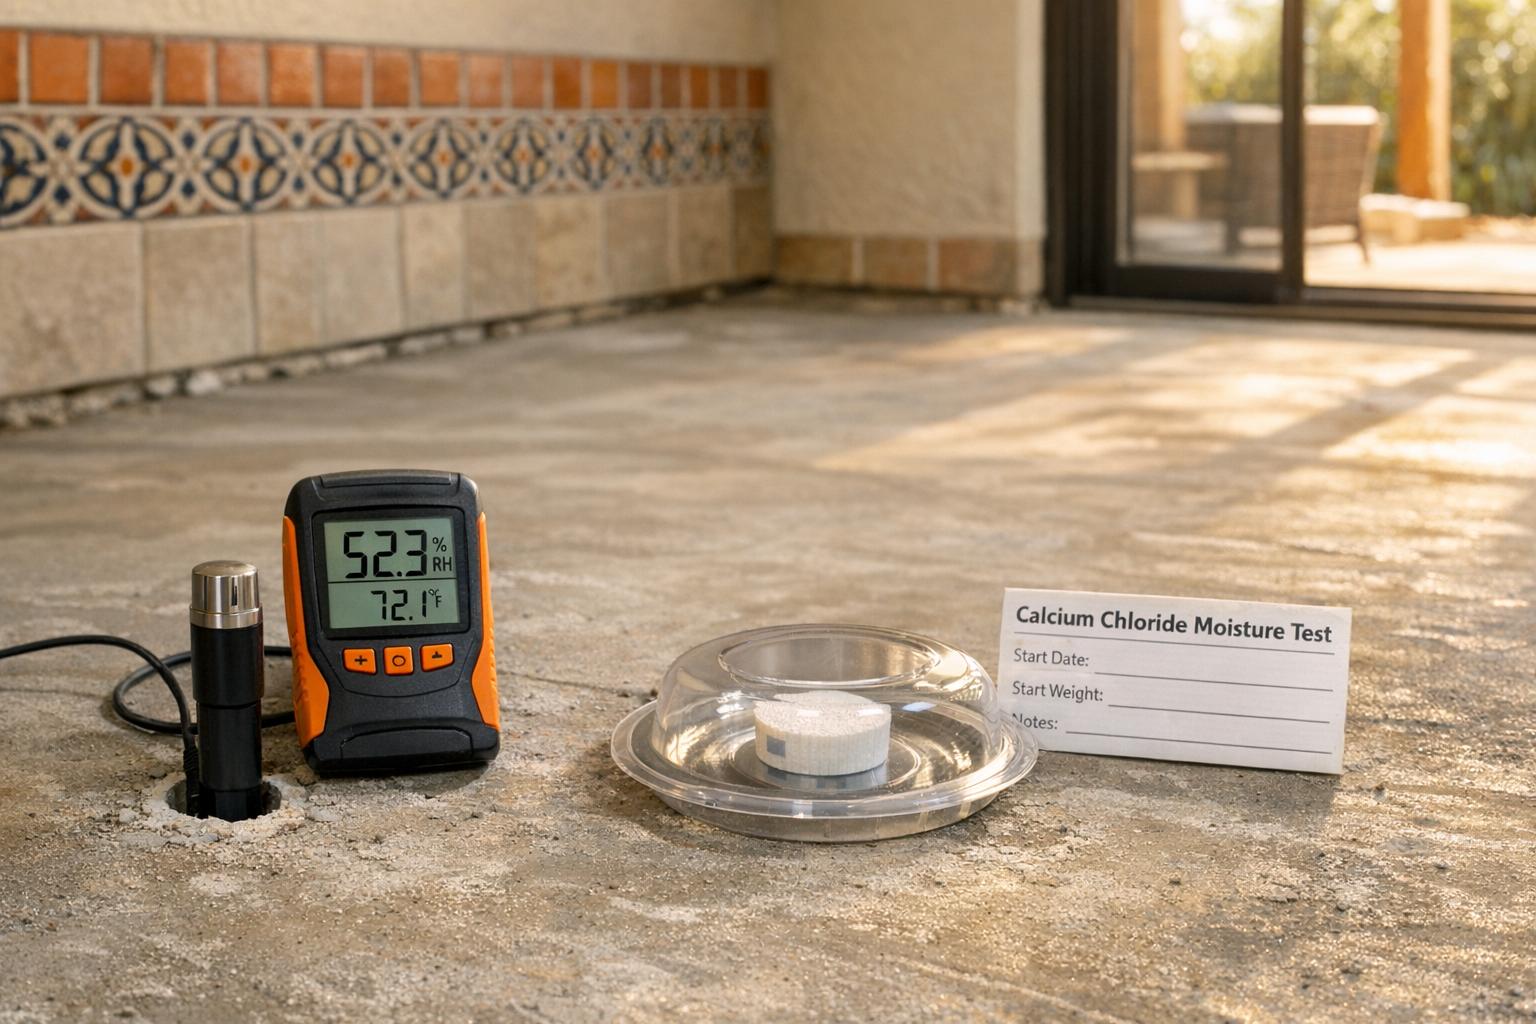
Mistake #1: Skipping Surface Preparation (Cost to Fix: $2,000-$8,000)
"How hard can it be to stick tiles on a wall?"
This mindset destroys more DIY projects than any other factor. Surface prep isn't glamorous, but it's 40-60% of professional installation time for a reason.
What Goes Wrong:
🚫 Installing Over Wrong Surfaces
- Tiling over glossy paint (tiles fall off within months)
- Installing over old vinyl flooring (adhesive fails)
- Ignoring structural issues (tiles crack and shift)
🚫 Inadequate Cleaning
- Dust and grease prevent adhesive bonding
- Paint residue creates weak spots
- Old wallpaper glue causes failures
🚫 Ignoring Level Requirements
- Tiles need surfaces level within 1/8" over 10 feet
- Most Sacramento homes don't meet this standard
- Uneven surfaces create lippage and cracking
The Real Cost:
- Materials wasted: $2,000-$5,000 (complete removal required)
- Professional repair: $15-$25 per sq ft
- Total damage: Often 2-3x original professional installation cost
What Professionals Do:
✅ Complete surface assessment and testing
✅ Proper cleaning with appropriate methods
✅ Structural repairs when needed
✅ Leveling compounds and primers
✅ Substrate testing for compatibility
Professional prep adds $2-5 per sq ft but prevents disasters costing $15-25 per sq ft to fix.
Mistake #2: Wrong Adhesive Choice (Cost to Fix: $3,000-$12,000)
Not all tile adhesives are created equal. Sacramento's temperature swings and diverse home construction create specific challenges that generic "all-purpose" adhesives can't handle.
The Adhesive Nightmare:
🚫 "One-Size-Fits-All" Mentality
- Large format tiles need extended open time adhesives
- Natural stone requires non-acidic formulations
- Glass tiles need specialized no-show-through adhesives
- Generic adhesives fail with premium materials
🚫 Ignoring Environmental Factors
- Sacramento's hot summers and cool winters
- Bathroom moisture requirements
- Outdoor freeze-thaw resistance needs
🚫 Poor Application Technique
- DIYers achieve 60-70% coverage (need 95%+)
- Wrong trowel sizes create weak bonds
- Mixing errors compromise performance
Real Sacramento Example:
Homeowner used $3/bag "contractor grade" adhesive for large format porcelain. Tiles started failing after 8 months. Professional removal and reinstallation: $12,000. Proper adhesive would have cost an extra $200.
What Professionals Know:
✅ Tile-specific adhesive chemistry
✅ Climate-appropriate formulations
✅ Proper coverage techniques (95%+ bonding)
✅ Manufacturer tech support relationships
✅ Quality control throughout application
Professional adhesive selection adds $1-3 per sq ft but prevents failures costing $10-20 per sq ft to repair.
Mistake #3: Terrible Layout Planning (Cost to Fix: $5,000-$15,000)
Starting installation without proper layout planning is like building a house without blueprints. Once tiles are set, layout mistakes are permanent.
Layout Disasters We See:
🚫 No Planning = Visual Chaos
- Narrow tile slivers in prominent spots
- Unbalanced patterns that look amateur
- Awkward cuts around fixtures and corners
🚫 Ignoring Room Proportions
- Patterns that make rooms look smaller
- Cuts that draw attention to flaws
- Misaligned tiles creating visual confusion
🚫 Complex Patterns Without Experience
- Herringbone layouts that drift off-pattern
- Mixed-size installations that look random
- Pattern mistakes that compound rapidly
The "Point of No Return" Problem:
Once you've installed 20-30 tiles with poor layout, you face an impossible choice:
- Continue and live with obvious mistakes
- Rip everything out and start over ($5,000-$15,000)
Professional Layout Process:
✅ Detailed measurements and drawings
✅ Mock-ups and pattern testing
✅ Cut planning for optimal appearance
✅ Balance and proportion analysis
✅ Quality checkpoints throughout installation
Professional layout planning prevents complete do-overs that cost $10,000-$20,000.
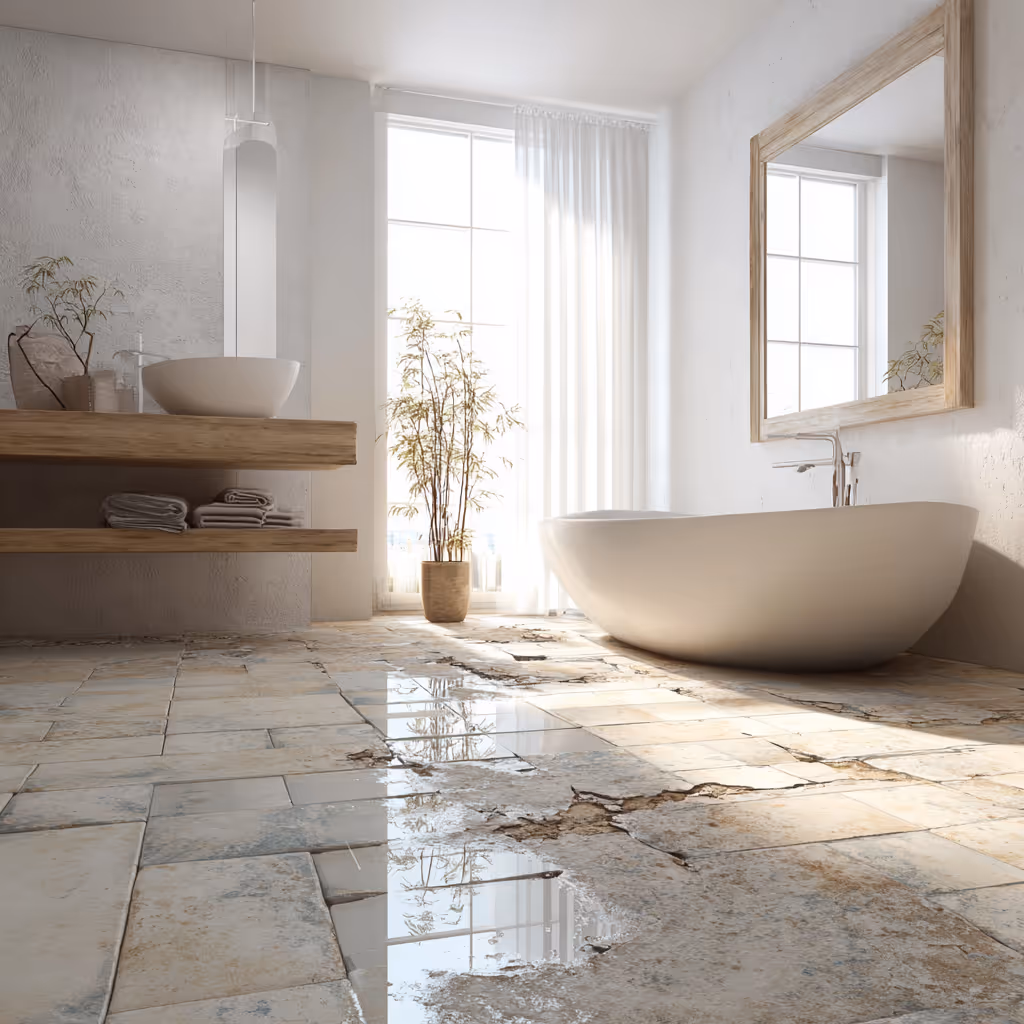
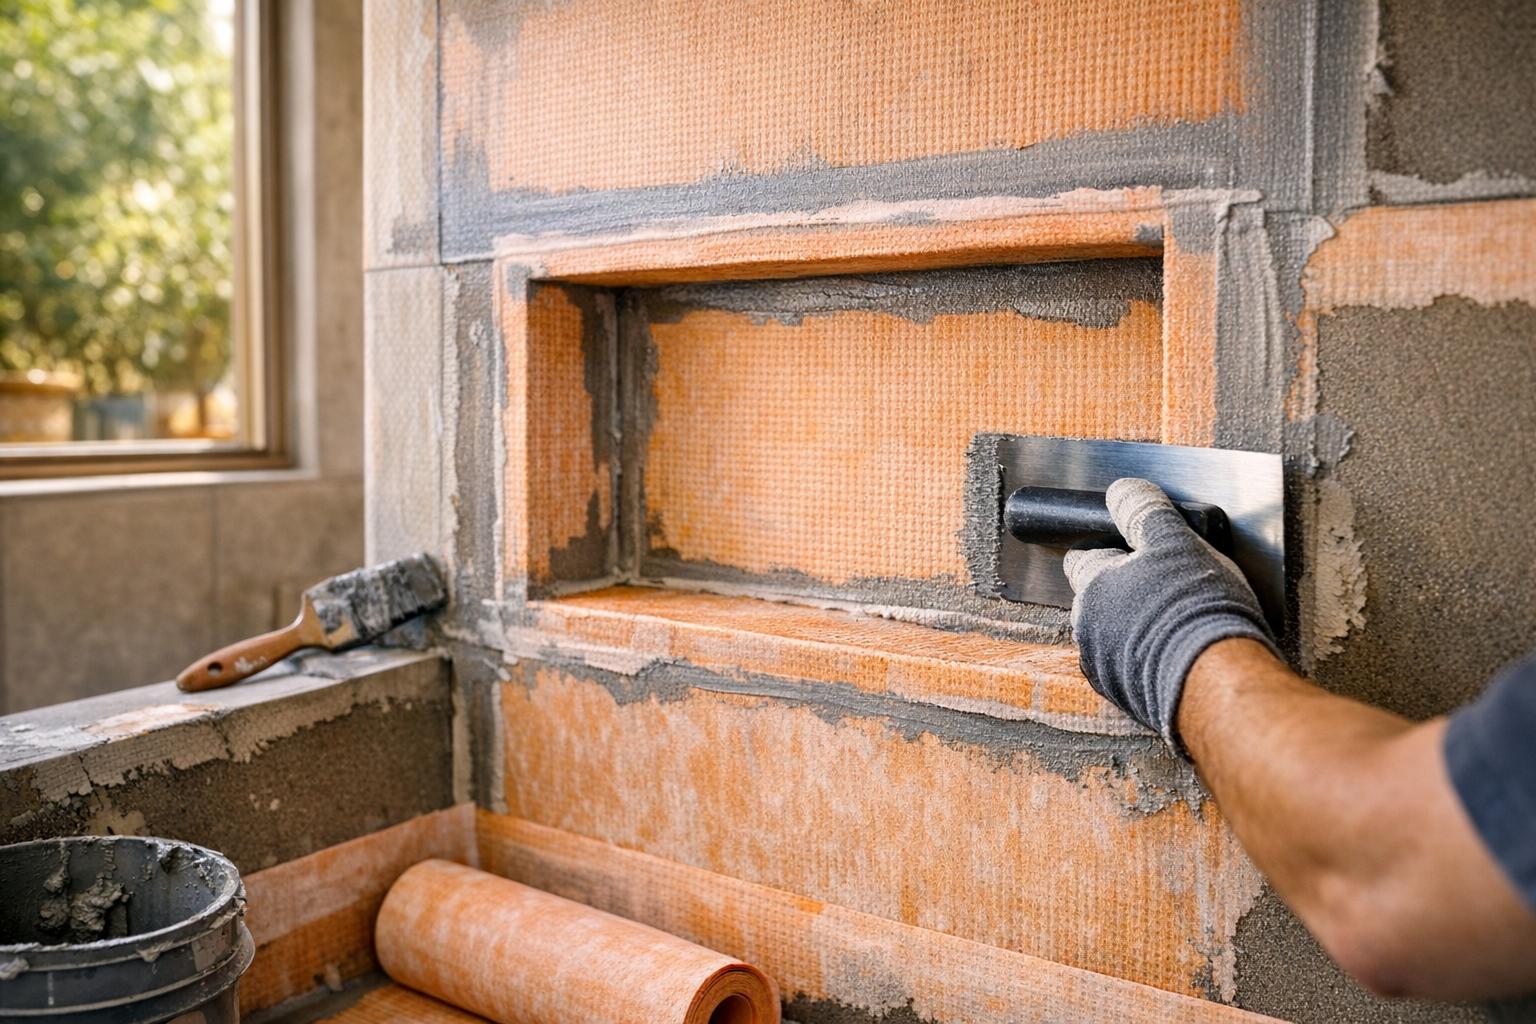
Mistake #4: Waterproofing Failures (Cost to Fix: $10,000-$50,000+)
This is the big one. Waterproofing mistakes don't just ruin tile – they can destroy your entire home and create health hazards that affect your family for years.
The Waterproofing Myths:
🚫 "Grout is Waterproof"
- Grout is porous and absorbs water
- Water penetrates behind tiles
- Damage happens slowly, then catastrophically
🚫 "Plastic Sheeting Works"
- Building codes require proper membranes
- Plastic doesn't accommodate movement
- Creates condensation problems
🚫 "It's Just a Small Bathroom"
- Even small leaks cause major damage
- Water travels through building materials
- Mold grows in hidden spaces
Real Sacramento Horror Story:
DIY shower installation skipped waterproofing membrane. After 18 months, mold smell led to discovery of major structural damage. Total repair cost: $47,000 including framing replacement, mold remediation, and complete bathroom reconstruction.
The Hidden Damage:
💸 Structural repairs: $15,000-$30,000
💸 Mold remediation: $5,000-$15,000
💸 Complete reconstruction: $20,000-$40,000
💸 Temporary housing during repairs: $3,000-$8,000
Professional Waterproofing:
✅ Code-compliant membrane systems
✅ Proper integration with plumbing
✅ Seamless corners and penetrations
✅ Testing and quality assurance
✅ Long-term performance guarantees
Professional waterproofing adds $3-6 per sq ft but prevents catastrophic damage costing $50,000-$100,000+.
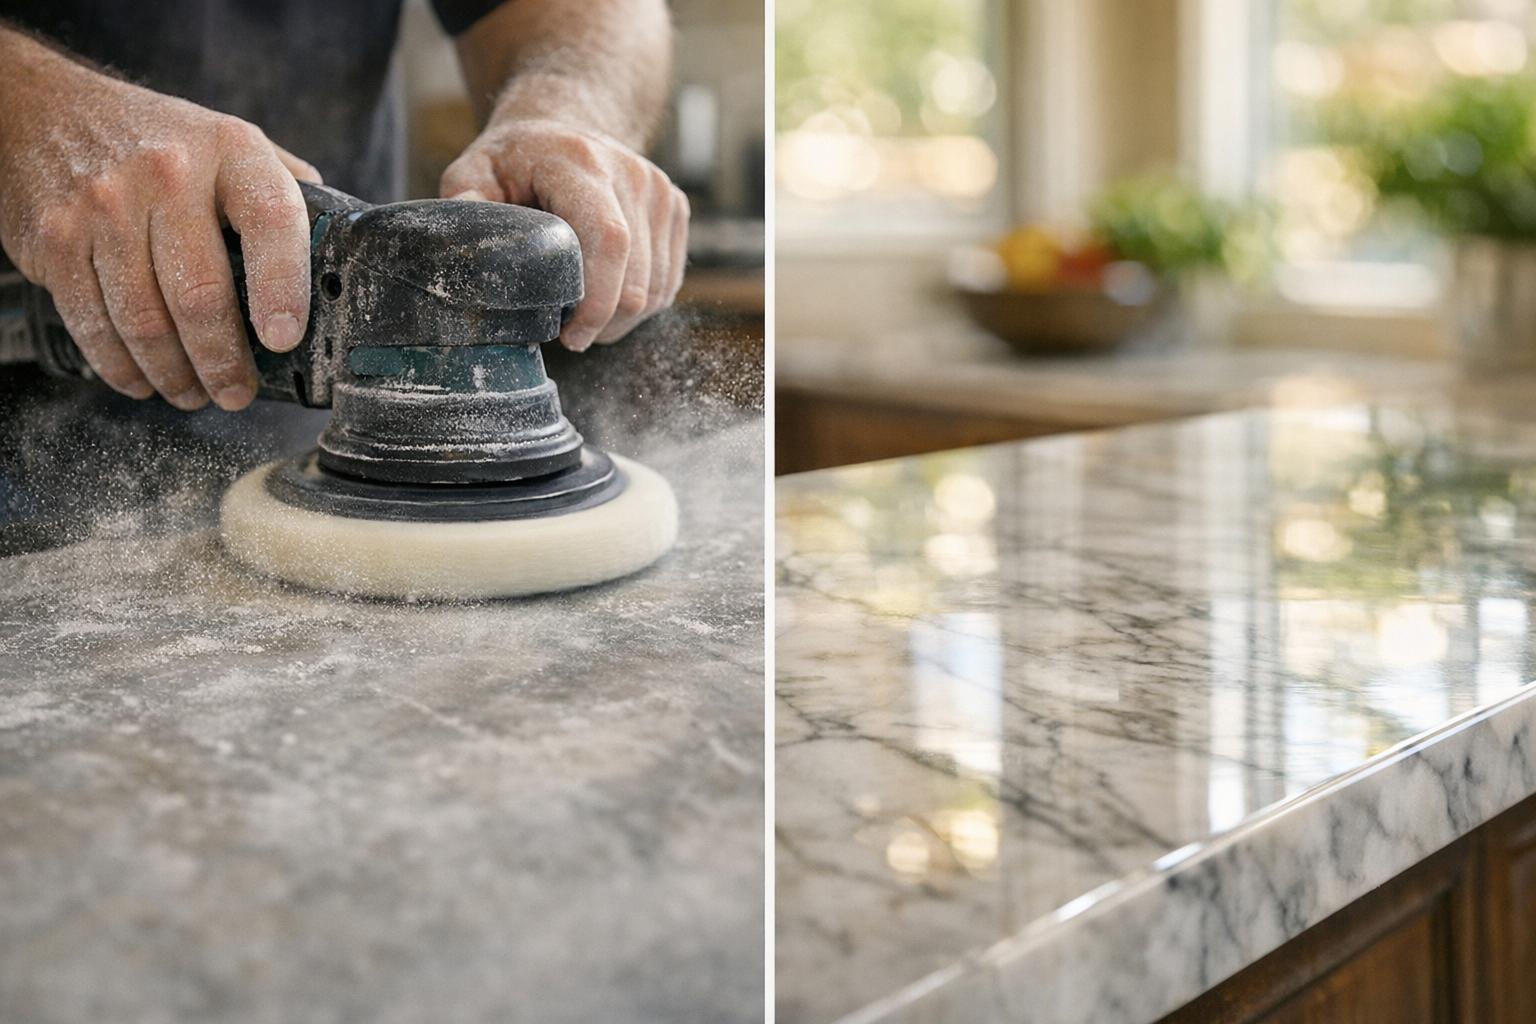
Mistake #5: Wrong Tools = Wrong Results (Cost: $2,000-$5,000 in tools + poor results)
Professional tile installation requires specialized tools most homeowners don't own. Using wrong tools guarantees poor results and wastes expensive materials.
The Tool Reality Check:
💰 Essential Professional Tools:
- Wet tile saw: $300-$800
- Angle grinder with diamond blades: $200-$400
- Professional trowels (multiple sizes): $100-$300
- Leveling systems: $200-$500
- Measuring and layout tools: $300-$600
- Safety equipment: $200-$400
Total tool investment: $2,000-$5,000 (often more than professional labor!)
What Goes Wrong:
🚫 Inadequate Cutting Equipment
- Chipped tile edges from wrong tools
- Inaccurate cuts that don't fit properly
- Broken expensive tiles during cutting
🚫 Wrong Trowel Sizes
- Poor adhesive coverage
- Hollow spots that fail later
- Uneven tile surfaces
🚫 No Safety Equipment
- Health hazards from dust and chemicals
- Eye injuries from tile chips
- Respiratory problems from silica dust
Professional Advantage:
✅ $10,000+ in specialized equipment
✅ Years of experience using tools safely
✅ Proper techniques for each material
✅ Tool maintenance and calibration
✅ Safety protocols that protect health
Tool costs alone often exceed DIY labor savings – and that's before considering poor results.
Mistake #6: Rushing the Process (Cost: Project failure + stress + health risks)
Tile installation can't be rushed. Every material has specific timing requirements. Ignore them, and your entire project fails.
The Rush Job Disasters:
⏰ Adhesive Timing Failures
- Working past open time creates weak bonds
- Tiles shift and fail within months
- Temperature and humidity affect timing
⏰ Skipping Curing Time
- Walking on tiles too soon
- Grouting before adhesive cures
- Water exposure before sealing
⏰ No Quality Control
- Missing alignment problems
- Ignoring spacing issues
- Lippage that can't be fixed later
The Weekend Warrior Problem:
"I'll tile the bathroom this weekend!"
Reality check:
- Professional bathroom: 3-5 days minimum
- DIY bathroom: 2-4 weeks (if done right)
- Rushed DIY bathroom: Lifetime of problems
What Professionals Know:
✅ Material-specific timing requirements
✅ Environmental condition impacts
✅ Quality checkpoints throughout process
✅ Proper curing and protection protocols
✅ Realistic scheduling that ensures quality
Rushing destroys quality and requires complete reinstallation costing 150-200% of original professional installation.
Mistake #7: Material Miscalculations (Cost: $500-$3,000 in delays + matching issues)
Running out of tile mid-project isn't just inconvenient – it can be a disaster if exact matches aren't available.
The Calculation Catastrophes:
🚫 Inadequate Waste Factors
- DIY waste: Often 15-25% (vs. professional 10-12%)
- Complex patterns need higher waste factors
- Breakage during cutting and installation
🚫 Forgetting Essential Components
- Trim pieces and transitions
- Grout and sealing materials
- Underlayment and preparation materials
🚫 Batch Matching Issues
- Tile colors vary between production runs
- Texture differences between batches
- Discontinued patterns mid-project
Real Sacramento Example:
Homeowner ordered exact square footage for kitchen backsplash. Ran out of tiles with 15% remaining. Original tiles discontinued. Had to rip out all installed tiles and start over with new pattern. Total loss: $2,800.
Professional Material Management:
✅ Accurate waste factor calculations
✅ Complete material takeoffs
✅ Supplier relationships for availability
✅ Quality control and batch coordination
✅ Future repair material reserves
The TRUE Cost of DIY Disasters
Let's be honest about what these mistakes really cost Sacramento homeowners:
Direct Financial Damage:
💸 Average DIY bathroom failure: $8,000-$15,000 to fix
💸 Severe waterproofing failure: $25,000-$50,000+ in damage
💸 Material waste from mistakes: $2,000-$5,000 average
💸 Tool purchases used once: $2,000-$5,000
Understanding actual bathroom renovation costs helps you budget for professional installation from the start and avoid these expensive disasters.
Hidden Costs:
🏠 Lost home value from amateur work
⚕️ Health risks from mold and poor air quality
😰 Stress and family tension from project disasters
⏱️ Lost time (projects take 3-5x longer than expected)
Insurance Reality:
Most homeowner's insurance doesn't cover DIY installation failures. Water damage from improper installation? You pay out of pocket.
Why Professional Installation Actually SAVES Money
Here's the math that surprises homeowners:
Professional Value Breakdown:
✅ No tool purchases: Save $2,000-$5,000 immediately
✅ No material waste: Save $1,000-$3,000 on average
✅ No disaster repairs: Save $5,000-$50,000+ potential
✅ Faster completion: Back to normal life in days, not months
✅ Warranty protection: Peace of mind and financial backup
Quality That Lasts:
- Professional installations: 20-30+ years typical lifespan
- DIY installations: Often need repairs/replacement in 5-10 years
- Long-term value: Professional work increases home value
Professional installation combined with proper tile maintenance ensures decades of beautiful performance and protects your investment.
The Sacramento Advantage:
Sacramento's building codes, climate challenges, and seismic considerations require local expertise that DIY can't match.
Professional installers understand:
✅ Local building code requirements
✅ Sacramento's climate impacts on materials
✅ Seismic considerations for tile installations
✅ Permit and inspection processes
✅ Local supplier relationships and material availability
Ready to Protect Your Investment?
Don't let DIY disasters destroy your renovation dreams and budget. Professional installation isn't an expense – it's insurance against costly disasters that can devastate your home and finances.
Skyline Tile's Professional Protection:
🛡️ 20+ Years Sacramento Experience – We've seen every mistake and know how to prevent them
🛡️ Licensed, Bonded & Insured – Your investment is protected
🛡️ Comprehensive Warranties – We stand behind our work
🛡️ Local Code Expertise – Fully compliant installations
🛡️ Quality Materials – Access to professional-grade products
Our Complete Protection Package:
✅ Expert surface preparation and assessment
✅ Proper adhesive selection for your specific conditions
✅ Professional layout planning and design
✅ Code-compliant waterproofing systems
✅ Precision installation with quality control
✅ Complete project management
✅ Transparent pricing with no surprises
Get Your FREE Protection Consultation Today:
We Protect Homes In: Sacramento, Granite Bay, Roseville, Rocklin, Folsom, El Dorado Hills, and surrounding communities
Don't gamble with your home's most important investment. These seven mistakes have cost Sacramento homeowners millions in repairs and heartache. Professional installation costs less than fixing these disasters – and delivers results you'll love for decades.
Schedule your free consultation today and discover how professional installation saves money while protecting your family and home.
Professional installation. Guaranteed results. Sacramento's most trusted tile experts.