January 15, 2026
Shower Waterproofing: Step-by-Step Guide
Step-by-step shower waterproofing: planning, membrane options, pan prep, wall/niche sealing, flood testing, and code requirements for durable tile showers.
Step-by-step shower waterproofing: planning, membrane options, pan prep, wall/niche sealing, flood testing, and code requirements for durable tile showers.
Proper shower waterproofing prevents costly water damage, mold growth, and structural issues. Many assume tile and grout block water, but without a waterproof membrane, moisture seeps through, causing long-term problems. Here's a quick breakdown:
Careful planning, quality materials, and precise installation ensure a long-lasting, watertight shower. Let’s dive into the details.

Complete Shower Waterproofing Process: 12 Essential Steps
To achieve durable and effective shower waterproofing, it’s essential to focus on detailed planning and selecting the right materials, following proper safety and substrate preparation.
Each shower configuration demands specific waterproofing and tile installation techniques. For instance, a standard alcove shower (usually 3x5 ft) with three walls and a curb is the easiest to waterproof. On the other hand, walk-in and curbless showers require extra thought and preparation, as they need sufficient clearance beneath the subfloor to accommodate the slope and tile assembly thickness.
Features like built-in benches or niches bring additional challenges. These areas must have a slope of 1/4 to 1/2 inch per foot toward the drain to prevent water from pooling. Steam showers, in particular, demand membranes with a vapor permeance rating of 1.0 perm or lower to protect wall cavities from moisture damage.
When choosing materials, you have several substrate options: cement backer boards (e.g., HardieBacker), fiber-cement boards, or integrated foam boards like Wedi or GoBoard. For waterproofing, you can opt for liquid-applied products like RedGard or Hydro Ban or bonded sheet membranes such as Schluter-Kerdi. Remember, these materials require specific thin-set mortars: ANSI A118.1 unmodified thin-set for sheet membranes and ANSI A118.4/A118.15 modified thin-set for cement boards and liquid membranes.
Additional materials include alkali-resistant fiberglass mesh tape, screws, washers, and silicone or polyurethane sealant. Pre-formed components like pipe gaskets, mixing valve seals, and pre-fabricated corners are essential to prevent leaks at transitions.
For tools, gather the following:
Here’s a quick comparison of waterproofing systems to help you decide:
| System Type | Cost (3x5 Alcove) | Installation Speed | Best For |
|---|---|---|---|
| Liquid Membrane | $250–$350 | Slower (24-hour cure) | Budget-conscious DIYers |
| Sheet Membrane | $400–$550 | Moderate (12-hour cure) | Steam showers and pros |
| Foam Board Kits | $650–$900 | Fastest (2-hour cure) | High-volume remodelers |
Before starting, make sure to review local building codes to ensure everything complies with structural and performance standards.
The 2024 International Residential Code (IRC R307.2) and Uniform Plumbing Code (UPC 408.5) outline specific guidelines for shower waterproofing. Waterproof membranes must extend at least 72 inches above the drain, and the shower floor must slope at least 1/4 inch per foot toward the drain. Additionally, shower drains must have an outlet diameter of at least 1.5 inches and comply with ASME A112.18.2/CSA B125.2 standards.
All waterproof membranes must meet ANSI A118.10 standards for bonded waterproof membranes. For sheet membranes, seams need a minimum 2-inch overlap to maintain a watertight seal. Before tiling, conduct a flood test: fill the pan to the top of the threshold and let it sit for 24 hours (48 hours for steam showers) to check for leaks. Ensure backer board stud spacing doesn’t exceed 16 inches on-center, with fasteners placed every 6 inches.
Once you’ve chosen your materials and finalized the planning, it’s time to waterproof the shower pan. This is a critical step - your shower pan forms the foundation of the waterproofing system. Getting it right now can save you from costly water damage later. Whether you’re using a traditional pan liner or a modern bonded membrane, precision and proper sequencing are key.
Start by ensuring your subfloor - whether it’s OSB, plywood, or concrete - is clean, level, and free of debris. If you have a wood subfloor, lay down a slip sheet, such as tar paper or roofing felt, to stop the subfloor from absorbing moisture from the mortar. Cut a 4.5-inch hole for the drain and install the lower half of the clamping drain, making sure the flange is level or slightly raised above the subfloor.
The pre-slope is a step you cannot skip. This sloped mortar base channels water toward the drain, preventing water from pooling and saturating the mortar bed. Mix a "dry pack" mortar (1 part Portland cement to 4 or 5 parts damp sand) and create a slope of 1/4 inch per foot from the walls to the drain. Cover the drain hole with duct tape to keep mortar out of the plumbing.
"A common error is to ignore the pre-slope installation and place the pan liner directly over the flat subfloor... the system will not effectively drain the water to the weep holes in the drain, creating a permanently saturated mortar bed."
– Sean Gerolimatos, Research and Development, Schluter Systems L.P.
Add solid blocking (2x6 or 2x12 boards) between wall studs to support the membrane securely. Build the shower curb by stacking three or four 2x4 studs flat and attaching them firmly to the subfloor and wall studs. Once the base is prepped, move on to installing the pan liner or bonded membrane.
The proper installation of the liner or membrane is just as crucial as the preparation. Attention to detail here can prevent future leaks and damage.
For traditional pan liners, seal the drain flange with silicone or MS polymer before laying down the PVC or CPE liner. Extend the liner at least 6 inches up the walls and over the curb. Use "hospital folds" at the corners instead of cutting the liner, especially at wall-to-curb transitions. Secure the liner with staples only at the very top, keeping them at least 2 inches above the finished curb height to avoid puncturing the waterproof zone. Apply pre-formed dam corners at curb junctions using bonding adhesive. Around the drain’s weep holes, place crushed stone or tile scraps to keep them clear when applying the final mortar bed.
For bonded membrane systems, replace the traditional clamping drain with an integrated bonding flange drain. Apply sheet membranes using thin-set mortar with a 1/8 inch by 1/8 inch square-notch trowel, ensuring a minimum 2-inch overlap at all seams. If using liquid membranes, apply two even coats over the sloped base (whether it’s a prefabricated foam tray or mortar bed). Allow the first coat to fully dry - indicated by a color change - before applying the second. Let the mortar bed cure for three days before applying liquid membranes.
| Feature | Traditional Pan Liner | Bonded Membrane |
|---|---|---|
| Water Management | Water penetrates the mortar bed to liner/weep holes | Water stops at the surface; mortar bed stays dry |
| Drain Type | Clamping ring drain with weep holes | Integrated bonding flange drain |
| Application | Installed under a secondary mortar bed | Installed topically under tile |
| Cure Time | 2–3 days (multiple mortar layers) | 1–2 days (faster with foam or liquid membranes) |
Once the liner or membrane is installed, it’s time to confirm the system’s integrity with a flood test. This step ensures your waterproofing is solid before tiling begins.
After the application has cured, remove the drain strainer and insert a mechanical test plug into the drain pipe - avoid using duct tape for this. Fill the shower base with water up to the curb height and mark the water level on the liner or wall. This will help you detect any changes.
Let the water sit for at least two hours, though some building codes may require up to 24 hours. A successful test means the water level stays constant, with no signs of moisture on the surrounding wall framing, subfloor, or ceiling below. When the test is complete, remove the plug and let the water drain through the system.
"Let the water sit for at least two hours to determine the waterproof status of your shower pan liner application. There are no leaks if the water level hasn't dropped, the surrounding area is not wet and water is not leaking from the ceiling."
– Oatey Co
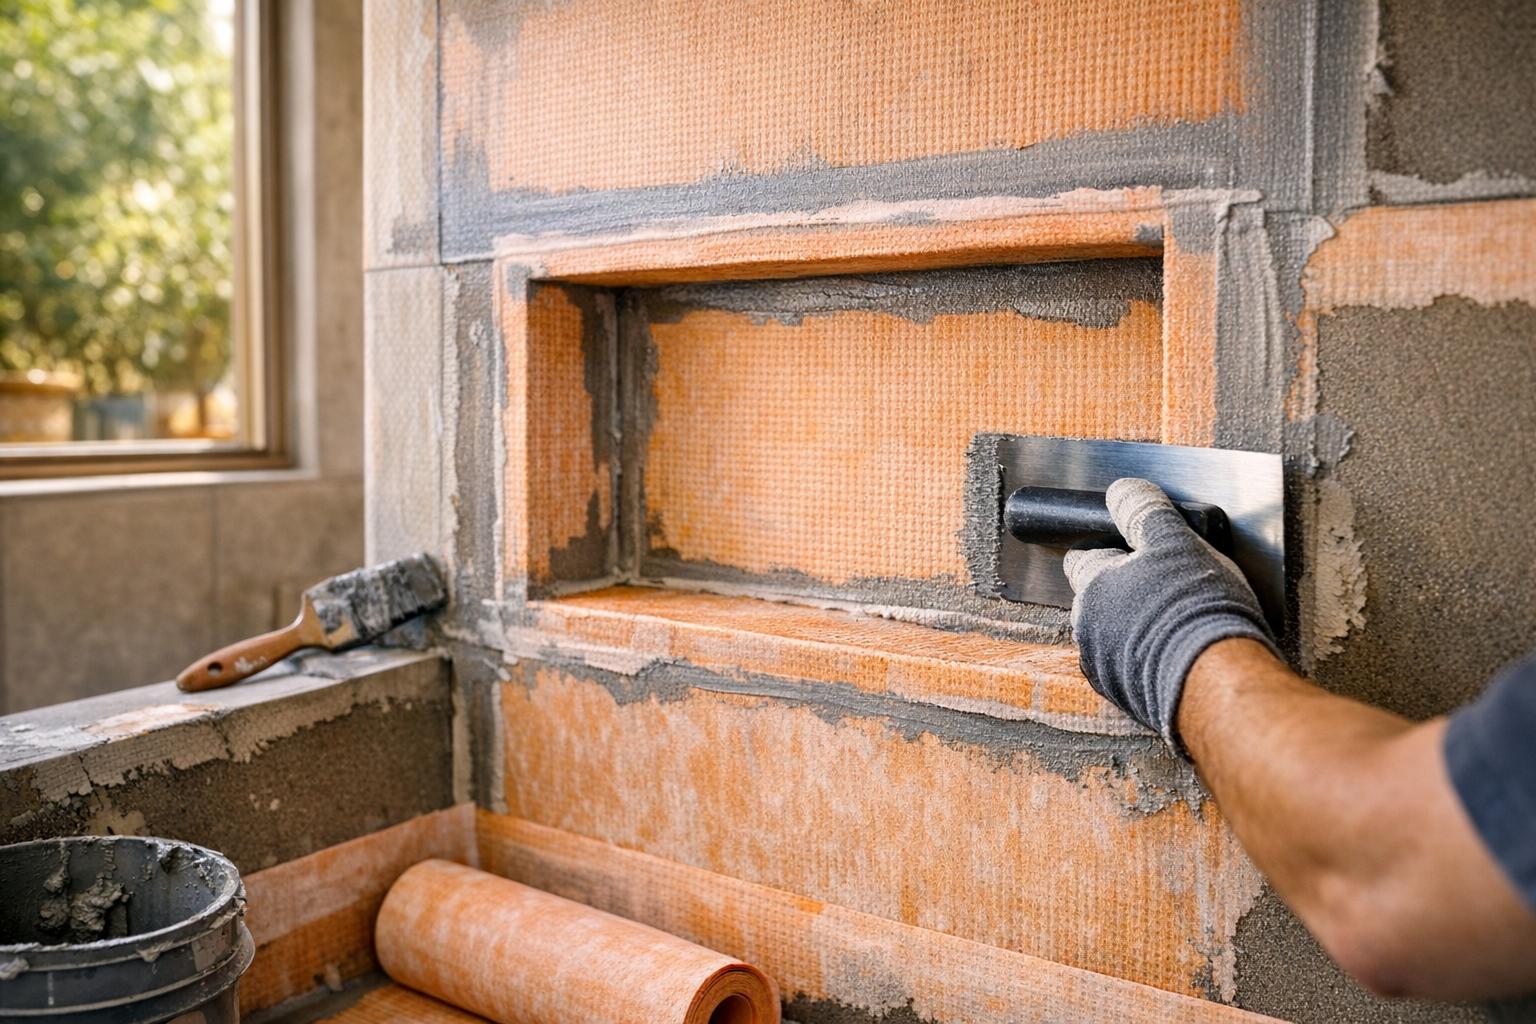
Once the shower pan is waterproofed and passes its test, it's time to move up to the walls. Remember, it's the waterproof membrane - not the tile or grout - that protects your framing and substrate from moisture damage.
Start by checking that your walls are plumb within 1/8 inch over 8 feet and that the studs are spaced no more than 16 inches apart. If you're using sheet membranes, apply an unmodified ANSI A118.1 thin-set mortar with a 1/4x3/16-inch V-notched trowel. Press the membrane into place from top to bottom, smoothing out air pockets as you go. Be sure to overlap seams and transitions by at least 2 inches. For corners and edges, use pre-formed inside and outside corner pieces to ensure a watertight seal.
If you're working with liquid membranes, apply at least two coats with a brush or a 3/8-inch nap roller. Use a "cross-hatch" method: apply the first coat with vertical strokes and the second coat with horizontal strokes to ensure complete coverage. Aim for a 12-mil wet film thickness, which cures to 6 mils when dry. A wet-film gauge can help you confirm the correct thickness. Before rolling the larger areas, use a brush to apply a detailed coat around corners, seams, and fastener heads to fill any pinholes.
Overlap membrane pieces in a "shingle" pattern, starting with the bottom pieces first and finishing with the top. This way, water flows over the seams rather than into them. If you're working with cement board, dampen it with a sponge before applying the thin-set. This prevents the board from pulling moisture out of the mortar too quickly, which helps create a stronger bond.
These techniques can also be adjusted to handle the specific challenges of niches and benches.
Niches and benches are particularly vulnerable to water damage if not waterproofed properly. For niches, wrap the entire cavity - including the back, sides, top, and bottom - with the membrane before sealing the face. This ensures there are no gaps where water can sneak through. Pre-formed KERDI-KERECK corners are ideal for sealing tight 90-degree angles.
When it comes to benches, make sure the seat is sloped 1/4 to 1/2 inch per foot toward the drain to avoid water pooling. Cover the entire bench with the membrane, extending it at least 6 inches up the adjacent walls. If you're using liquid membranes, don't forget to coat the underside of the front lip to stop water from wicking into the substrate. Avoid using staples or brad nails to secure membranes in niches or on benches, as these can create leak points.
| System Type | Best Use Case | Key Advantage |
|---|---|---|
| Liquid Membrane | Irregular/Custom Niches | Seamless coverage, works in tight angles |
| Sheet Membrane | Steam Showers | Vapor-tight (0.9 perm rating), consistent thickness |
| Foam Board | High-Speed Remodels | Pre-sloped, lightweight, easy to install |
After the membrane cures, perform a 24-hour flood test on niches and benches to ensure all transitions are watertight before proceeding with tile installation.
Once membranes are installed and flood tests are completed, it’s time to focus on sealing and final checks. For all transitions and corners, leave a 1/8-inch gap and fill it with 100% silicone or polyurethane sealant, as specified by ASTM EJ171. This type of flexible sealant is better at accommodating structural movement compared to rigid grout.
Make sure to apply sealant at every transition point, such as between the shower and the bathroom floor, around the curb, and anywhere different surfaces meet. Clean the joints thoroughly before sealing to ensure proper adhesion. For areas like mixing valves, shower arms, and showerheads, use rubber collars or pipe seals. Secure their flanges with sealant or thin-set to create a watertight barrier around these penetrations.
Before moving on to tile installation, carefully inspect all seams, corners, and fastener heads for gaps or pinholes. If you used a liquid membrane, shine a low-angle flashlight across the surface to spot thin or uneven areas. Check that all sheet membrane overlaps meet the 2-inch minimum standard required by ANSI A118.10.
Confirm that all horizontal surfaces are sloped 1/4 inch per foot toward the drain. If the liquid membrane has been curing for more than 72 hours, lightly scuff it with 120-grit sandpaper to improve mortar adhesion. Finally, vacuum and wipe down all surfaces with a damp sponge to remove dust and debris before applying thin-set. These steps will ensure the surface is ready for tiling and integrates seamlessly with other systems.
After completing the inspection, connect the shower waterproofing to other systems for full moisture protection. Skyline Tile specializes in integrating shower waterproofing with adjacent systems, like heated floors and bathroom floor membranes. When working with heated floor systems, make sure the waterproofing membrane is compatible with the heating cables or mats. Typically, the membrane should be installed over the heating system to shield electrical components from moisture.
At floor-to-wall transitions, extend the wall reinforcement 3 to 4 inches down over the shower pan or floor membrane. This creates a continuous gutter effect, helping to keep water contained within the shower. For curbless entries, install solid blocking at the edge where the shower floor meets the bathroom tile. Ensure the subfloor slopes at least 1/4 inch per foot toward the drain. With Skyline Tile's expertise in waterproofing and heated floor installation, these intricate transitions are handled effectively, reducing the risk of costly mistakes.
Creating a watertight shower requires careful planning, high-quality materials, and precise execution. From preparing the substrate to conducting a 24-hour flood test and sealing every transition, each step plays a critical role in preventing water damage. This guide has highlighted the key steps to ensure your shower stands the test of time.
As industry expert Mark DeFusco wisely points out:
"Waterproofing shower walls for tile is one of those rare places where the cheapest day to fix a problem is the day you build it".
When done correctly, a well-waterproofed shower can last 20–30 years. On the other hand, cutting corners or using subpar methods can result in leaks within just five years. The cost of quality waterproofing materials - typically between $250 and $900 - is a small price to pay compared to the average remediation costs of $6,000 to $12,000.
Building codes emphasize the importance of a continuous waterproof layer and proper mortar coverage to ensure lasting performance. For those seeking professional results, Skyline Tile offers expertise in waterproofing, heated floor integration, and bathroom renovations. Their services not only minimize the risk of costly errors but also come with a 5-year workmanship warranty, providing added peace of mind.
Whether you choose to tackle this project yourself or bring in professionals, following the steps laid out in this guide will help you build a durable, watertight shower that safeguards your home for years to come.
To build a long-lasting, leak-proof shower, steer clear of these common waterproofing mistakes:
Additional pitfalls include not creating the necessary 2%-3% slope toward the drain, applying the membrane unevenly or too thinly, skipping the flood test, or rushing the drying time between coats. These missteps can lead to mold, structural damage, and expensive repairs down the line.
Looking for peace of mind? Skyline Tile offers expert waterproofing services that ensure your shower is built to last. Their work adheres to local building codes and manufacturer guidelines, so you can trust you're getting a professional, worry-free installation.
When deciding between a liquid membrane and a sheet membrane, consider your skill level, the condition of the shower surface, and the specific needs of your project. Liquid membranes are a go-to for DIY enthusiasts since they’re easy to apply with a brush or roller and adapt well to uneven surfaces. On the other hand, sheet membranes offer greater durability and provide a seamless waterproof barrier but demand more precision. They require careful application with thin-set mortar and proper seam sealing, making them better suited for experienced individuals or professional installation.
If you’re still unsure which option fits your project, Skyline Tile can help. Their team can evaluate your shower and recommend the best waterproofing solution. With their expertise and high-quality materials, they’ll deliver a flawless, long-lasting installation.
If your flood test reveals a leak, it’s crucial to fix it before moving forward with tiling to prevent water damage down the road. Start by stopping the test and allowing the area to dry completely - this helps avoid compounding the problem. Next, examine the waterproofing membrane, paying close attention to seams, corners, and any penetrations like pipe sleeves or drains to locate the source of the leak.
Once you’ve pinpointed the issue, carefully remove the damaged waterproofing material along with any tiles in the affected area. Clean the substrate thoroughly to prepare it for repairs, then reapply the correct waterproofing system. Make sure seams and corners are sealed properly to prevent future leaks. After completing the repair, perform another flood test to confirm the problem has been resolved.
If the leak continues or you’re uncertain about the repair process, it might be time to bring in a professional like Skyline Tile. Their waterproofing expertise can help ensure your shower is sealed and safeguarded against future problems.