February 2, 2026
Waterproofing Questions Homeowners Ask Most
Common waterproofing questions for Sacramento homeowners—materials, installation, maintenance, and when to hire a professional.
Common waterproofing questions for Sacramento homeowners—materials, installation, maintenance, and when to hire a professional.
Waterproofing is a critical step in protecting your home from water damage, especially in areas like Sacramento, where wet winters and dry summers create unique challenges. Without proper waterproofing, moisture can lead to structural damage, mold growth, and costly repairs. Here’s what you need to know:
Professional help ensures waterproofing is installed correctly and meets California’s strict building codes. Skyline Tile offers tailored solutions, durable materials, and a 5-year workmanship warranty to safeguard your home from water damage.
Waterproofing issues can crop up in various areas of your home. Spotting these problems early can help you prevent minor issues from escalating into costly repairs.
Bathrooms are particularly vulnerable to waterproofing problems because of constant exposure to moisture. Cracked waterproof membranes under shower pans or deteriorating grout lines can let water seep into subfloors, leading to mold and even structural damage. If key areas - like around drains, pipes, or wall corners - are overlooked during installation, water will find its way into these weak points. Even if the membrane looks fine on the surface, prolonged exposure can weaken adhesives and damage materials like drywall or cement board.
Caulking around tubs, showers, and fixtures is another common trouble spot. Over time, caulk shrinks and pulls away, leaving gaps that water can exploit. Sacramento's fluctuating temperatures can speed up this wear and tear, further reducing the effectiveness of these seals.
Just like bathrooms, kitchens face their own set of waterproofing challenges due to frequent water use.
Kitchens deal with constant water exposure from sinks, dishwashers, and backsplashes, making them prone to waterproofing failures. When waterproofing under countertops or behind backsplashes isn't done properly, water can seep into cabinets, leading to warped or rotted wood.
Dishwasher leaks are another hidden culprit. Worn seals or faulty connections can allow water to pool under the appliance, damaging flooring, subfloors, and nearby cabinetry. Meanwhile, backsplash areas behind sinks and stoves need waterproof membranes and sealed grout lines to keep out steam and splashes. Without these precautions, drywall can absorb moisture, causing peeling paint and mold.
Improper surface preparation during installation is another common issue. If grease, debris, or loose materials aren't cleaned thoroughly before applying waterproofing products, adhesion can be compromised. Additionally, natural shifts in a home's structure can crack rigid waterproofing materials, creating new entry points for water.
While kitchens and bathrooms face indoor water challenges, outdoor areas battle their own unique waterproofing concerns.
Outdoor spaces like patios and courtyards often encounter water pooling due to poor drainage slopes. During winter storms, water collects in low spots and seeps into porous surfaces, weakening their structural integrity.
Pool decks are another area that demands strong waterproofing systems. Constant splashing and Sacramento's intense summer heat can cause waterproofing layers to fail. When this happens, water seeps beneath tiles or stone pavers, loosening them and damaging the substrate. Temperature swings can also cause tiles to crack or lift.
Planter boxes are a less obvious source of waterproofing problems. Moist soil can seep into nearby structures if barriers are insufficient, and overwatering can overwhelm the system, allowing moisture to penetrate.
Exterior stonework, such as outdoor fireplaces, waterfalls, and retaining walls, is also at risk. Mortar joints can deteriorate over time, especially with Sacramento's clay-heavy soils that expand when wet and contract when dry. Cracks in these areas let water in, causing issues like efflorescence (white mineral deposits), stone breakdown, and weakened structural stability.
Decks and balconies face similar challenges. If the waterproofing membrane beneath outdoor tiles fails, water can reach the wood or concrete below. During Sacramento's dry summers, trapped moisture can lead to wood rot or corrosion of metal fasteners, compounding the damage.
Once you've identified the common challenges of waterproofing, the next step is choosing the right materials. With options ranging from traditional sheet membranes to modern liquid-applied systems, the best choice depends on the specific application and environment.
Sheet membranes are pre-made waterproof barriers that come in rolls, typically crafted from materials like polyethylene or chlorinated polyethylene (CPE). These are ideal for large, flat surfaces such as shower pans, where they can provide consistent coverage with a uniform thickness of 30–40 mils. However, they require precise cutting and fitting around drains, corners, and penetrations. Seams and overlaps must be sealed correctly, either with adhesive or heat welding, to prevent leaks.
Liquid-applied membranes offer a seamless, rubber-like barrier that adapts to complex shapes. Applied like paint, these membranes cure to form a flexible, watertight layer. They’re particularly effective in areas with irregular shapes, such as custom shower niches, around plumbing fixtures, or outdoor steps with intricate designs. The liquid format allows for extra thickness in vulnerable areas and eliminates the risk of seams. Most liquid membranes cure within 24 to 48 hours, though some fast-drying options are ready for tile installation in just a few hours.
Cementitious waterproofing systems combine Portland cement with polymers to create a rigid, breathable barrier. These are often used behind tiles in wet areas like showers or steam rooms, as they block liquid water while allowing vapor to escape. However, their rigidity can be a drawback in areas prone to movement or vibration, as they may crack if the substrate shifts.
For homes in Sacramento, the choice of waterproofing material often depends on the application. Bathrooms with standard layouts might use sheet membranes for shower floors and liquid membranes for walls and corners. Kitchens benefit from liquid-applied systems in areas like backsplashes, where pipes and outlets create obstacles. Outdoor spaces, such as pool decks and patios, often require liquid membranes with high elongation properties to handle thermal expansion and contraction.
When installed correctly, a waterproofing system can last 20 to 30 years in most residential settings. However, Sacramento’s climate introduces unique challenges that can impact longevity. Hot, dry summers followed by wet winters create cycles of expansion and contraction, which test the durability of waterproofing materials.
Outdoor waterproofing is particularly affected by temperature swings. On summer afternoons, exposed surfaces like patios and pool decks can reach 110°F to 120°F, causing materials to expand. At night, temperatures may drop by 40°F to 50°F, leading to contraction. This constant movement stresses waterproof membranes, especially at seams and transitions. Products with an elongation rating of 200% or more perform best in these conditions.
Indoor waterproofing faces different issues. Poorly ventilated bathrooms trap moisture, which can degrade certain products over time. Steam showers, in particular, accelerate wear on membranes. In these cases, cementitious systems often last longer than liquid membranes because they’re designed to handle continuous exposure to moisture.
Installation quality is just as important as the product itself. Even the best waterproofing materials can fail within 5–10 years if poorly installed. On the flip side, a mid-range product installed with meticulous attention to detail - such as proper priming, curing times, and sealing at transitions - can exceed its expected lifespan.
Regular maintenance also plays a key role in durability. Tasks like inspecting and resealing grout joints, replacing worn caulk, and addressing minor cracks early can extend the life of a waterproofing system. Sacramento’s clay soils, which expand when wet and shrink when dry, can cause foundation movement that cracks rigid waterproofing layers. Catching and repairing these cracks promptly helps prevent water intrusion and further damage.
Recognizing these factors, Skyline Tile selects materials with longevity in mind.

Skyline Tile takes a tailored approach to waterproofing, treating each project as unique. The process begins with a thorough evaluation of the project’s conditions, including the substrate type, water exposure levels, temperature variations, and how the space will be used.
For showers, Skyline Tile often uses a combination of materials. Sheet membranes are applied to shower floors, where standing water is common, while liquid-applied membranes are used on walls, corners, and transitions. This strategy leverages the strengths of both products: the consistent thickness and puncture resistance of sheets, and the seamless coverage of liquid membranes. Extra care is taken around penetrations like drains and mixing valve openings, with multiple coats of liquid membrane ensuring a watertight seal.
In kitchens, the focus is on high-risk areas like sinks and dishwashers. Liquid membranes are applied to these zones, extending coverage at least six inches beyond the fixture footprint. For backsplashes, especially behind cooktops where steam and grease are constant, a thin layer of waterproof membrane is added beneath the tile to protect the drywall.
Outdoor projects require more durable systems. Pool decks and patios are treated with liquid-applied membranes designed for UV exposure and thermal cycling. Special attention is given to drainage slopes to ensure water flows away from structures. For outdoor kitchens and fireplaces, waterproofing extends behind all stonework to shield the framing and substrate from Sacramento’s winter rains. This targeted approach ensures each area receives the appropriate level of protection.
Skyline Tile also adheres to California building codes, which mandate specific waterproofing standards for wet areas. The team uses products that meet or exceed these requirements and incorporates features like proper flashing, weep holes, and drainage planes. A 5-year workmanship warranty backs their installations, giving homeowners peace of mind.
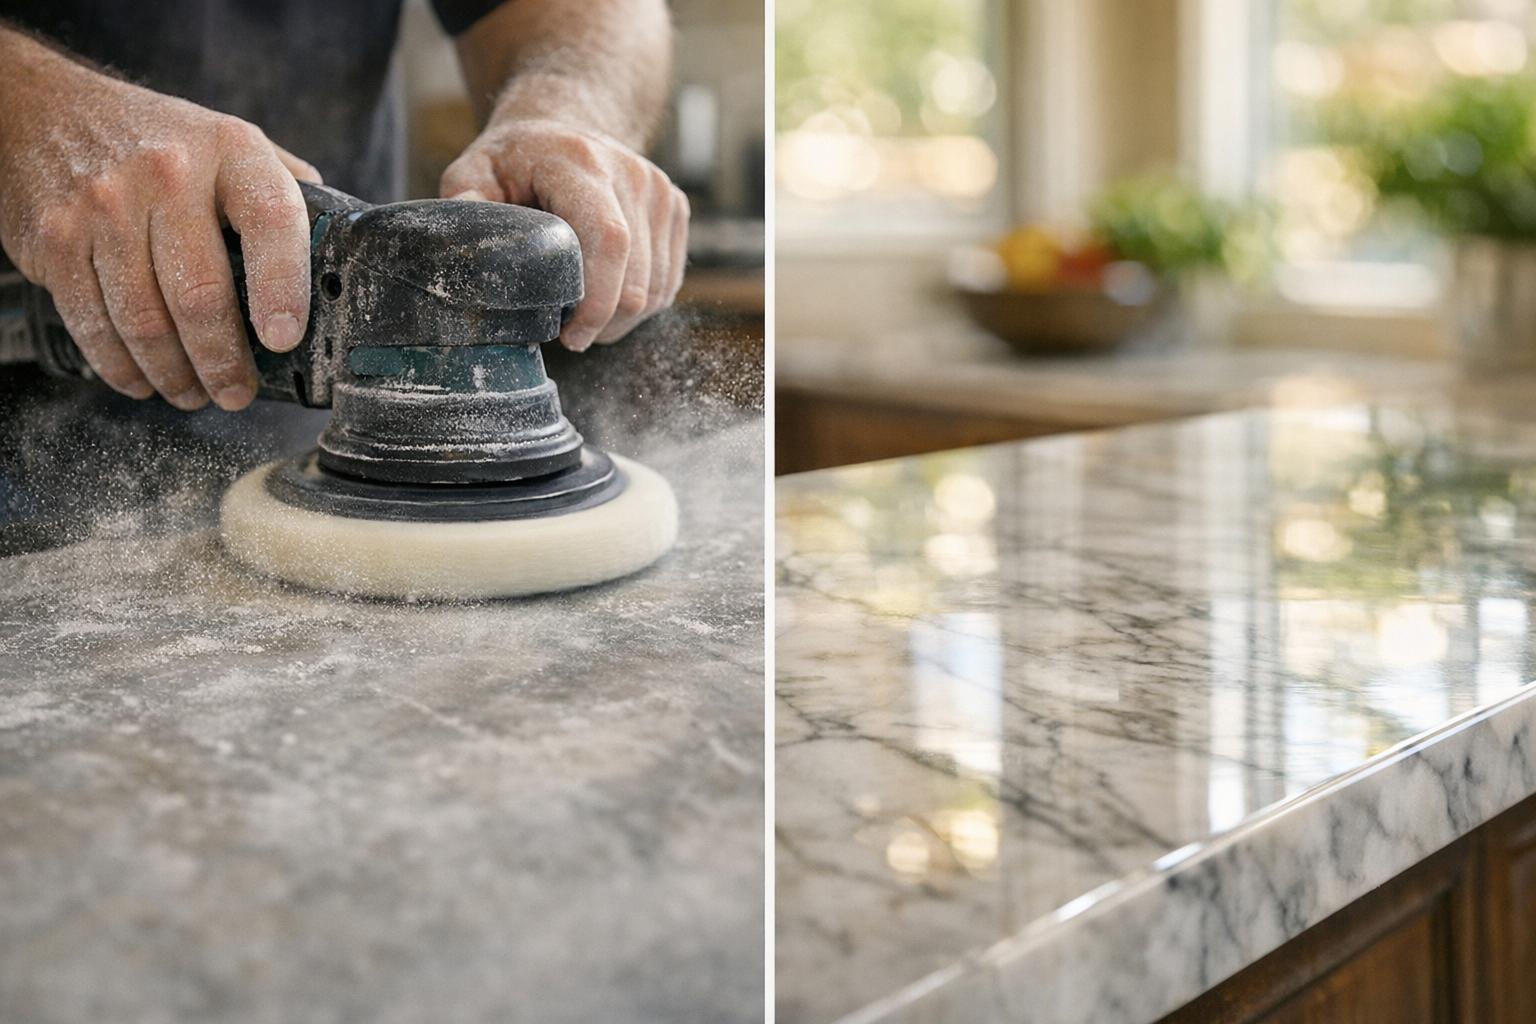
Surface preparation is another critical step in the process. Before applying any waterproofing product, the team cleans the surface, repairs cracks, and applies primer. For remodels, old, failed waterproofing is completely removed rather than covered up, ensuring a solid foundation for the new system. This attention to detail eliminates weak points and ensures long-lasting performance.
Getting waterproofing installation right the first time can save you from expensive repairs down the line. Each step matters, and knowing when to bring in a professional can make all the difference.
Once you've selected the right materials, proper installation is key to ensuring the system holds up over time.
Surface preparation lays the groundwork for success. Start by cleaning and drying the surface thoroughly. Any cracks wider than 1/8 inch should be patched with the appropriate compound. Remove all dust, grease, and loose debris. For remodels, strip away any old waterproofing materials to create a fresh surface.
Priming varies depending on the product you're using. Liquid-applied membranes often require a primer on porous surfaces like concrete or cement board to seal the area and create a smooth base. Sheet membranes, on the other hand, need a flat, even surface to avoid air pockets. Always follow the manufacturer’s instructions - using too much or too little primer can weaken the bond.
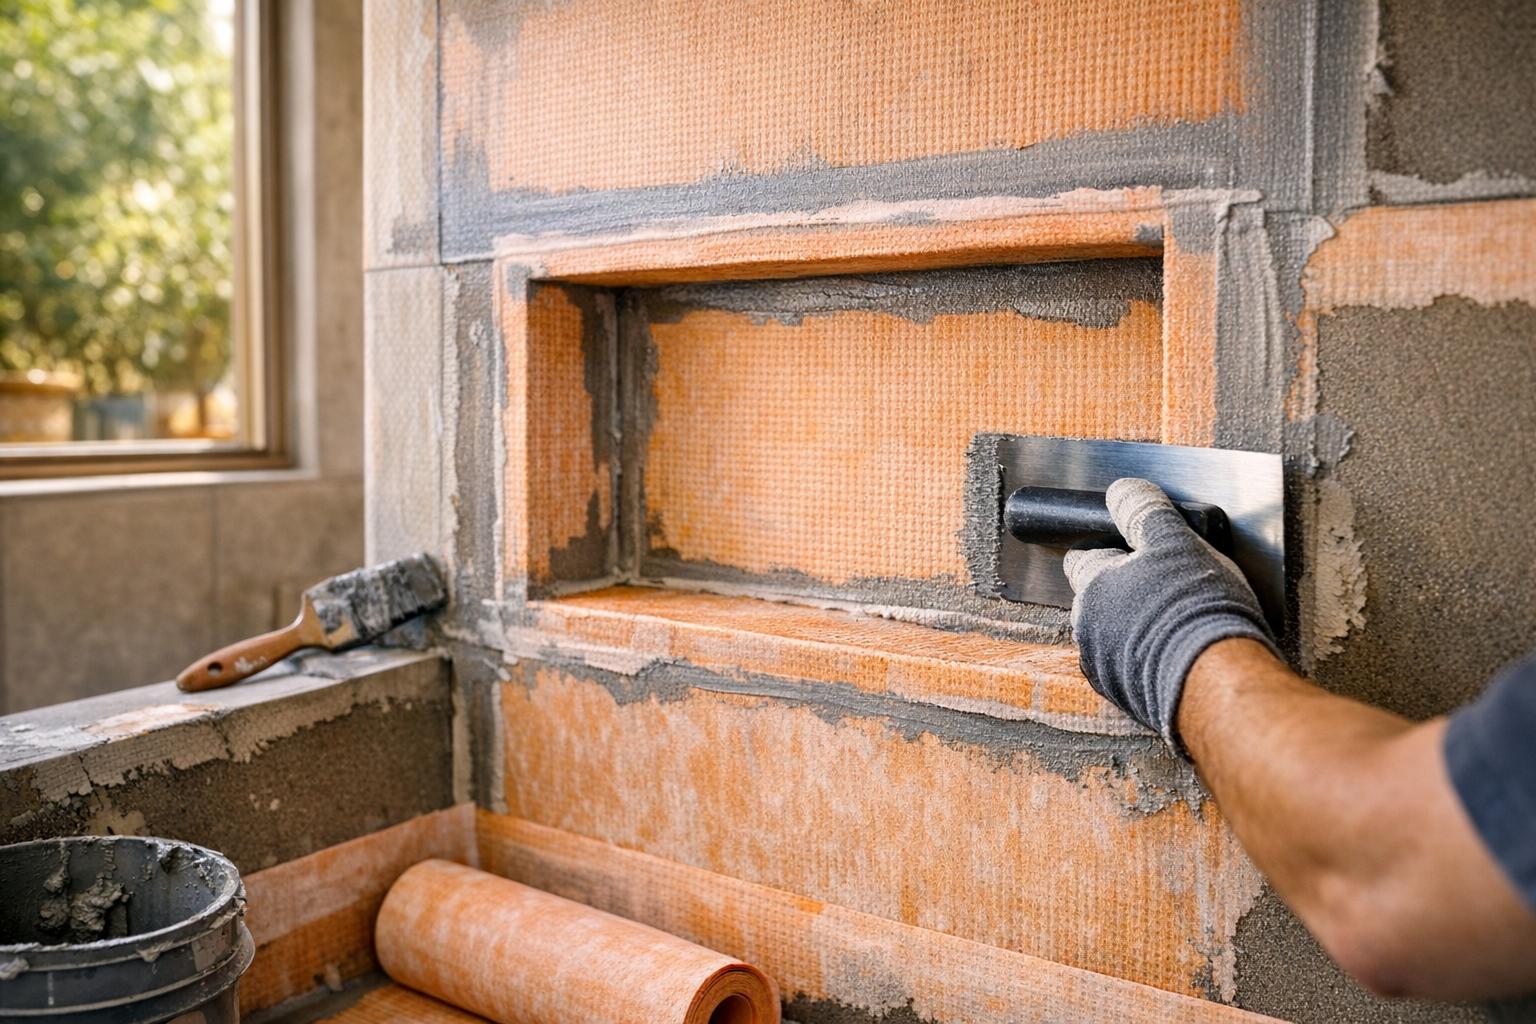
For sheet membranes, measure and cut the material carefully. Overlap seams by at least 2 inches, sealing them with adhesive or heat welding. Corners require extra attention - use pre-formed pieces or fold the membrane precisely. Around drains, precision cutting and layering are essential to ensure a watertight seal.
When applying liquid membranes, use a brush or roller to spread a uniform coat about 20–30 mils thick. Pay extra attention to inside corners, building up two to three layers. Reinforce transitions, corners, and penetrations with fabric strips (fiberglass or polyester) embedded in the wet membrane to prevent cracking. Once the first coat dries - usually within 2 to 4 hours - apply a second coat perpendicular to the first for added durability.
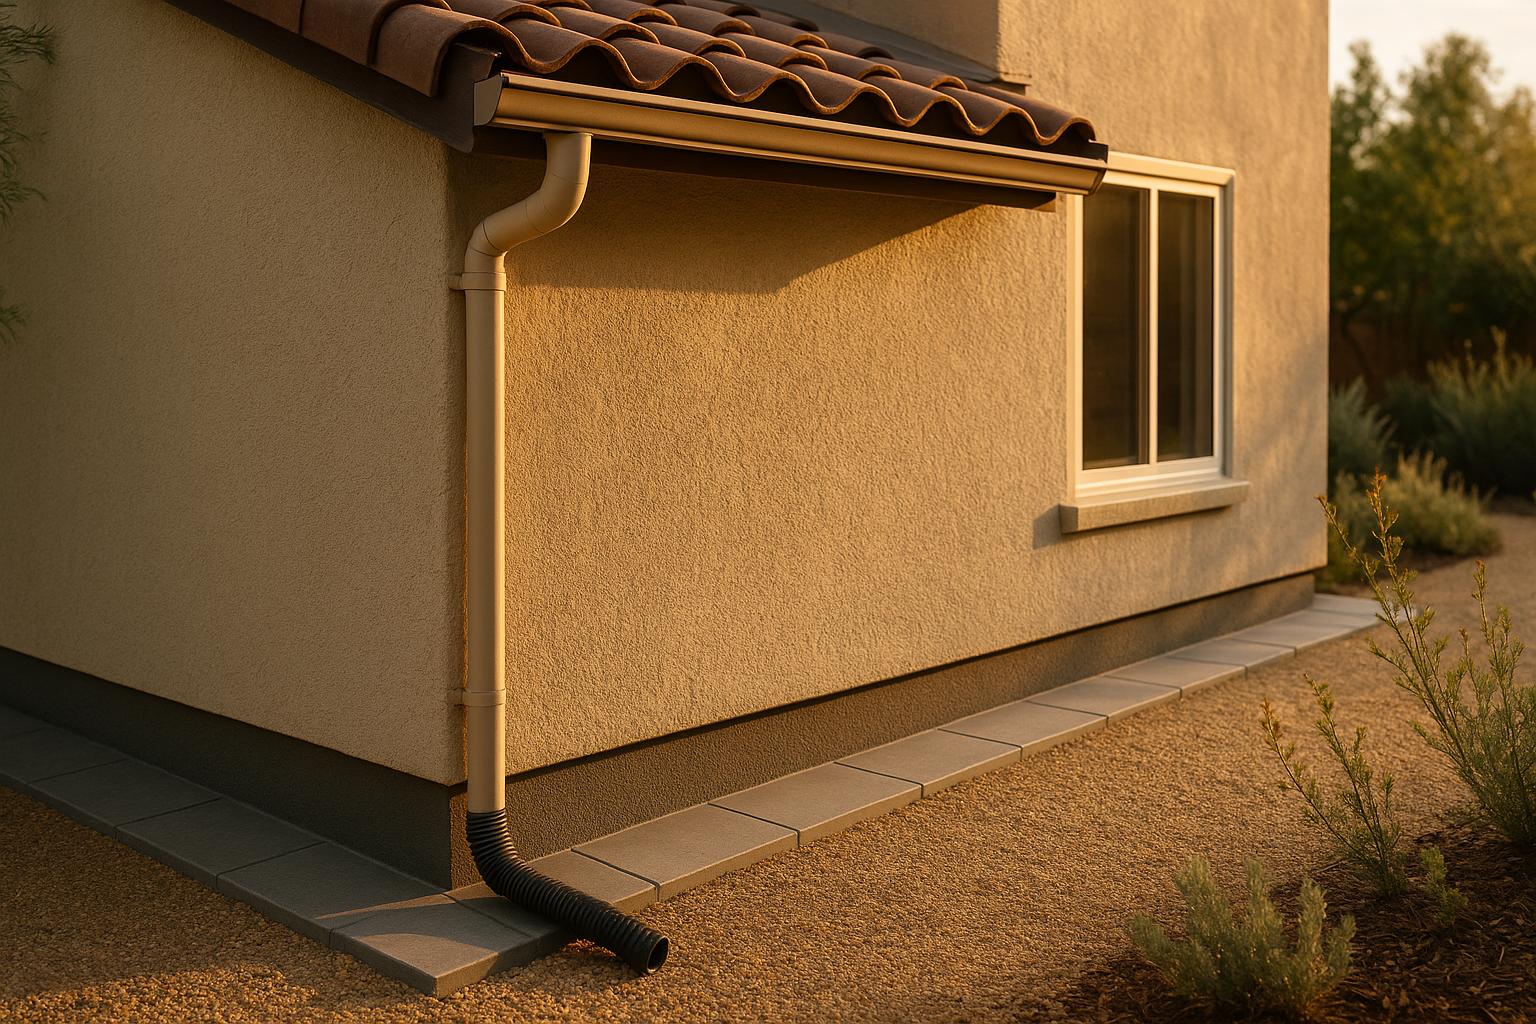
For drainage, ensure that shower floors slope toward the drain at a minimum of 1/4 inch per foot. Outdoor areas like patios or pool decks need drainage planes beneath the waterproofing layer to direct moisture away effectively.
Curing time is critical. Most systems need 24–48 hours to cure before tile installation, though some fast-setting products are ready in just 3–6 hours. During this time, protect the area from foot traffic, dust, and moisture.
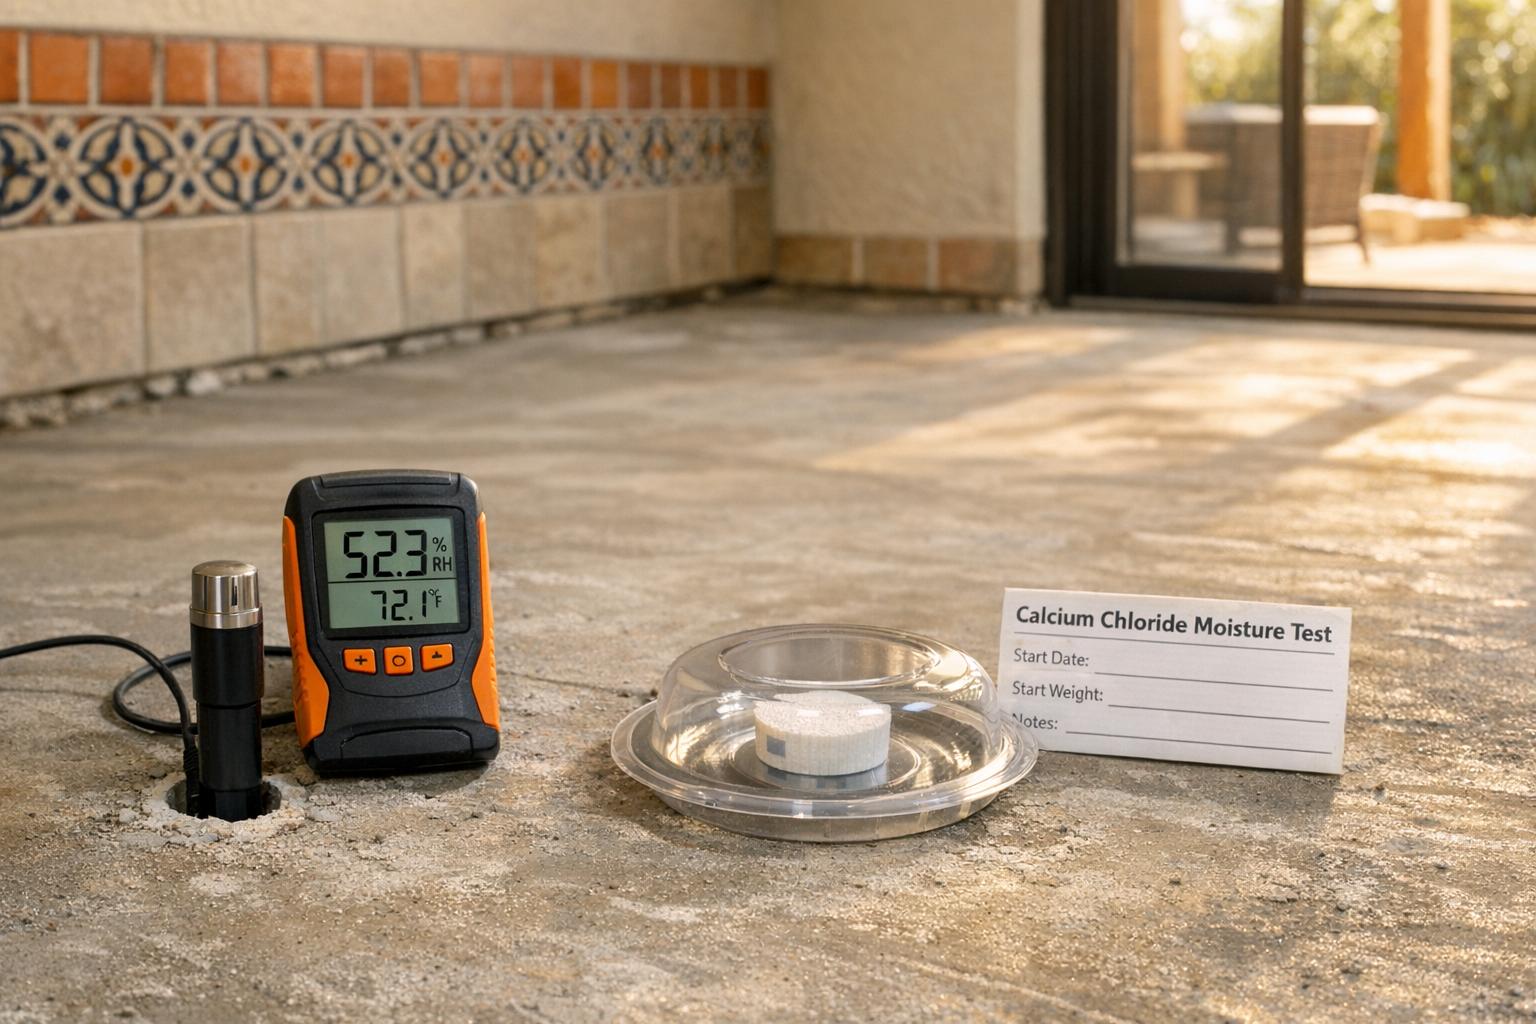
Finally, conduct a flood test for shower pans. Plug the drain, fill the pan with 2 inches of water, and let it sit for 24 hours. If the water level drops, it signals a leak that must be addressed before moving forward.
California’s building codes set strict rules for waterproofing in wet areas, and Sacramento inspectors enforce these standards rigorously. Under Title 24, bathrooms, showers, and other high-moisture spaces must meet specific moisture control measures to prevent water damage, mold, and structural issues.
For shower enclosures, the code requires waterproofing to extend at least 3 inches above the showerhead. However, many professionals take it all the way to the ceiling for added protection. The shower pan must include a waterproof membrane that goes up the wall at least 3 inches above the curb. All seams, corners, and penetrations need to be sealed properly, and the membrane must be securely attached to the drain assembly.
Vapor barriers are also required behind shower walls to stop moisture from seeping into wall cavities. Typically, a polyethylene vapor barrier is installed behind the backer board, with the waterproof membrane applied over it for an extra layer of protection.
California also emphasizes ventilation. Exhaust fans must be properly sized and vented directly to the outside to reduce indoor humidity. This not only prolongs the life of waterproofing systems but also helps prevent mold. In Sacramento, where warm summers and air conditioning are common, effective ventilation is particularly important.
Outdoor waterproofing follows similar principles. Decks, patios, and balconies above living spaces must have waterproof membranes to protect the structure below. Proper drainage - typically with a slope of at least 2% (about 1/4 inch per foot) - and flashing at transitions between horizontal and vertical surfaces are essential.
Inspectors check every detail, from substrate preparation to membrane installation and drainage. Materials must meet approved standards and be applied according to manufacturer guidelines. If the work doesn’t meet code, it may need to be redone. Skyline Tile consistently meets or exceeds these standards, offering a 5-year workmanship warranty for peace of mind.
These rigorous codes highlight why hiring a professional is often the best option.
Deciding between a DIY approach and hiring a professional can have long-term consequences for both performance and cost. DIY projects often run into issues like poor surface prep, incorrect primer use, or mistakes during membrane application - all of which can lead to premature failure.
Skyline Tile brings over 15 years of experience to every project, ensuring installations meet Sacramento’s unique conditions and California’s strict building codes. Their team tailors techniques to Sacramento’s climate and offers a 100% quality guarantee. Fully licensed and insured, Skyline Tile provides a level of protection that DIY methods simply can’t match. As part of their standard bathroom and shower installations, they include comprehensive waterproofing systems - moisture barriers, vapor barriers, and waterproof membranes - to meet code requirements and protect against water damage and mold growth.
A properly installed waterproofing system is just the beginning - keeping it in good condition over time is what ensures long-term protection for your home. Regular inspections and quick fixes when problems arise can help you avoid turning minor issues into expensive repairs. Here’s how to spot trouble and keep your system in top shape.
Identifying problems early can save you a lot of money and hassle. Here are some signs that your waterproofing system may need attention:
Taking care of your waterproofing system doesn’t have to be overwhelming. A few simple steps can go a long way:
If these steps don’t resolve your concerns, it might be time to bring in professionals.
Some waterproofing problems are too complex for DIY solutions and require expert attention. Here’s when to call Skyline Tile:
Waterproofing is a must-have for Sacramento homes, safeguarding your tile and stonework from water damage and the hefty price tag of repairs. Even the best tile installation can fail without proper waterproofing, as moisture can creep in, leading to loose tiles, crumbling grout, hidden mold, and even structural damage.
The key to a waterproofing system that stands the test of time lies in expertise and precision. As Tim O'Shea from The Build Pros explains, "Some basement waterproofing methods can actually cause your water or moisture problems to get worse, which is why it's so important to call in a professional who knows how to solve your underlying issue and use the appropriate waterproofing methods". This highlights the importance of relying on skilled professionals rather than cutting corners with DIY fixes that often overlook deeper issues, ultimately costing more in the long run.
Skyline Tile brings the experience and know-how Sacramento homeowners need to ensure waterproofing is done right the first time. Their deep understanding of California building codes, Sacramento's unique climate, and the specific challenges homes in the area face allows them to deliver durable, code-compliant solutions. With careful material selection, precise installation, and a 5-year workmanship warranty, Skyline Tile takes a comprehensive approach to waterproofing, addressing both the visible and hidden aspects of water protection.
Whether you're updating a bathroom or designing an outdoor space, professional waterproofing is crucial for protecting your home's structure and finishes. Skyline Tile doesn’t just install tiles - they provide a full waterproofing system that safeguards your home’s integrity, promotes healthy indoor air, and preserves the beauty of your surfaces. Their expertise ensures you get a system built to last, offering both protection and peace of mind for years to come.
If your home's waterproofing is failing, you might spot damp patches on walls or ceilings, cracks in surfaces, peeling paint or plaster, mold or mildew, or even a musty smell indoors. During heavy rainfall, water might even seep into your home. Ignoring these signs can result in serious, long-term damage.
To tackle the issue, begin by figuring out where the water is coming from. Solutions often include sealing cracks with waterproofing compounds, applying water-resistant coatings to the affected areas, or setting up proper drainage systems. If the problem is severe, it’s best to bring in a professional who can evaluate the situation and suggest durable materials and techniques tailored to your home’s needs and local climate.
Sacramento’s weather is a tale of two extremes: scorching, dry summers and wet, rainy winters. These conditions can put waterproofing materials to the test. During the summer, the intense heat causes materials to expand and contract, which can lead to cracks or weaken seals. When winter rolls around, the heavy rains often create standing water, which can wear down surfaces and gradually undermine the waterproofing.
To keep things in good shape, it’s crucial to select durable, high-grade materials that can handle these challenges. Regular maintenance is also key - it helps catch and fix any damage before it becomes a bigger issue.
When it comes to waterproofing, there are three main options to consider: sheet membranes, liquid-applied membranes, and cementitious waterproofing. Each comes with its own set of strengths and challenges.
Sheet membranes stand out for their consistent thickness and impressive durability. However, they require precise installation, which means you’ll need skilled professionals to get the job done right. On the other hand, liquid-applied membranes are incredibly adaptable, making them perfect for irregular or complex surfaces. They offer a seamless finish but do demand proper surface preparation and adequate curing time. Lastly, cementitious waterproofing is a budget-friendly and easy-to-apply option. That said, it’s quite rigid, which makes it less suitable for areas prone to movement or cracking.
Choosing the right waterproofing method depends on the specific area you’re tackling, your budget, and the unique conditions of your space. For instance, liquid-applied membranes are an excellent choice for bathrooms with tricky layouts, while sheet membranes are ideal for spaces requiring high durability. Cementitious waterproofing works best for straightforward projects like basements or patios where flexibility isn’t a priority.